Since not everyone has ever heard of, let alone made a faux stained glass window, I thought that I would share with you some of my thoughts about making one.
My goal was to make a fairly large window and I only wanted to do it once. I knew that I would need to make a sample piece before I did the big window, but what size should I do? I decided that a small project was best.
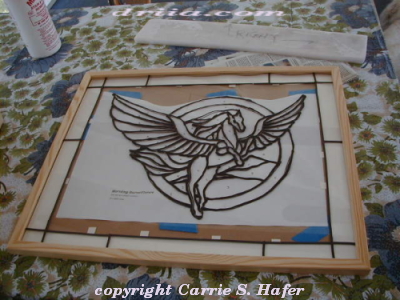
First I took an unused basic plain wood picture frame, that had real glass, from my stockpile of “up for grab” items. Then I went looking for an actual stained glass pattern at a local store. (you may be able to find simple patterns online for free) I found a nice Pegasus pattern, which after I had it about half done I decided might have been too ambitious.

Having previously purchased a variety of the paint colors I was set to go, so I removed the glass from the frame and placed it on a work table over the cut out stained glass pattern.
There were a lot of curves and I was using the liquid “lead” paint. Taking my time and doing a few practice runs on scrap paper I quickly got the hang of starting and stopping a constant line of paint. If you are doing a basic geometric pattern then using the strips of straight self adhesive lead lines is really the way to go.
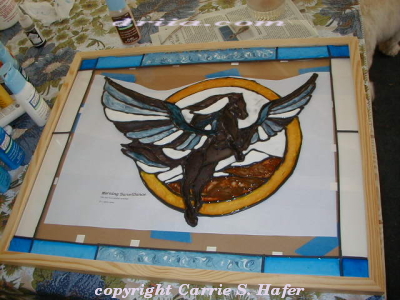
As advised in the instructions I waited for the liquid leading to dry before starting the coloring process. Which basically consists of squeezing some of the right colored paint into the designated area, and using either a toothpick or in my case a stainless nut pick to guide the pooled paint into the entire target area and especially into the corners.

Things went very quickly but I was less than satisfied with my first attempt. I made a few rookie mistakes, and I had to keep checking that I had the right color in the right section.
I found that when using Gallery Glass Paints that I needed to make sure that each separate color is done and dried before working on the next color. This will help to prevent you from accidentally smudging the paint causing blotching and unsightly wrinkling of the paint. While it adds a lot of time – it gives you the best results.
The colors will be opaque to start and then dry more transparent or with a pearl finish depending on the color choice.
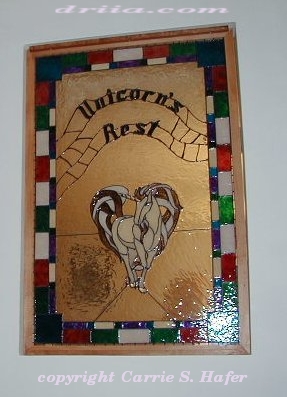
Overall I was very glad I made a “practice” piece first….here is the result of my large window wall piece.
Here is a brief list of tips to help you avoid some of the pitfalls I made on my first attempt and allow you to create a more authentic stained glass effect:
- Place a dot of the “lead” paint at each of the joint intersections – this simulates a solder joint nicely.
- Use two or more paints lightly swirled together with a clean toothpick to give depth of field. I like to use a translucent pearl with a solid to give a shimmer. Be careful not to over mix the colors together.
- Where you intend to leave clear glass – use a clear glass or very lightly tinted paint – then when the paint is just slightly dry… swirl it to give a textured effect.
- To fix a mistake – do nothing until it’s dry. Then carefully cut out the mistake and re-do. If you try to clean up an area that you goofed before it sets – you usually end up with a bigger mess that is smeared and a lot harder to fix.
- Don’t forget to use a clean toothpick or straight pin to lightly pop bubbles as they surface, or you may end up with mini craters in the dried paint.
- Tape the pattern to the underside of the glass – that way if you bump the glass – you don’t shift your pattern.
- Use a copy of your pattern – not the original – so that you can mark it with color choices. Once these are marked make sure to leave the pattern in place until you are done. You will be able to easily see which color goes where without having to frequently stop and recheck.
Creating your own faux stained glass window can be greatly satisfying or tremendously frustrating. But I encourage you to give it a try – you may surprise yourself. I consider this a great way for people who don’t think they are all that creative to make something they can show off and bring sense of confidence to other artistic en devours.

